 |
To capture a new form proceed as follows:
1. If you are not already in the Project Life Cycle application, click Project lifecycle on the Application Menu.
2. Click Project registration (MIG1) on the Content tree.
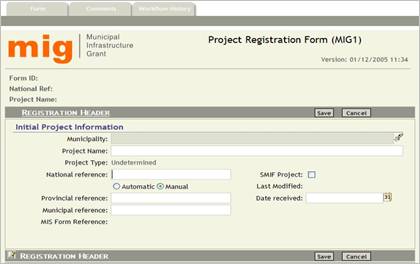
3. Click Capture on the Action Bar. A blank form will appear in the Results pane. All forms are split into sections that are displayed in an outline view containing only the headings, until you expand a particular section by clicking the hyperlink. The only exception to this rule occurs when you capture a new form. The first section is then automatically expanded because most of the later sections depend on the first.
|
Data entry |
Before you start entering data, note that borders and background colours are used for a specific purpose:
• All fields with a border and white background, such as Project name and Provincial reference will accept free-form typing.
•
Fields with a border but coloured background, such as Municipality
and Date received can only be completed by clicking the icons to the
right of them ![]() ,
, ![]() .
.
• Fields without a border, such as National reference are calculated by the MIS.
|
Data entry in tables |
Many tables behave similar to a spreadsheet, in which you select the first cell, enter data and move to the next cell by clicking it or pressing the Tab key on your keyboard. Shift + Tab will take you to the previous cell.
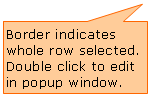
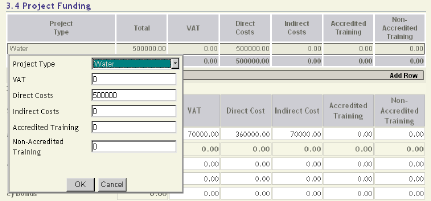
Depending on the nature of the validations that must be done by the MIS, some tables use popup windows to capture the data for an entire row. The clue to which tables behave in this way (apart from visual styling clues) is that the whole row is selected when you click any cell in the row as illustrated below. If this happens, double click the row to open the popup window. Once in the popup window you can also use Tab or Shift + Tab keys on your keyboard to move between cells.
|
Adding rows to a table |
Another clue to tables that work with popup windows is the presence of an Add Row button below the table.
4. When you have completed a section, click either of the Save buttons above or below the expanded section.
5. Expand the next section by clicking anywhere on the heading and work through the form until you have saved Section 7.
|
Submitting the form |
6. You are now ready to submit the form into the workflow process. This is done by clicking Submit on the Action Bar. Although some validation is done as you enter data, the Submit action subjects the entire form to a final validation. Any problems encountered at this stage are listed at the bottom of the form.
7. The MIS sends an e-mail to the person(s) responsible for recommending the form.
Once you have submitted a form you will no longer be able to edit anything on the form, unless it is referred back for revision and neither the Project Manager nor the PMU Manager can attend to the revision.
 Contents
 Index
Index Search
 Previous
 Next
Next